
Uploading a Flipbook to Your Website
Uploading your flipbook is simply a matter of connecting to your website, creating a directory, and placing all the files from the downloaded ZIP file into that directory. This guide walks you through the entire process step by step.
Get an FTP Client
First, you will need an FTP client to upload your files. Any FTP client will work — popular choices include FileZilla (free, open-source), Cyberduck, and WinSCP. The steps below apply to virtually every FTP client.
Connecting to Your Website
Connecting to your website is straightforward, but you will need the correct FTP credentials. If you do not have your FTP login details, contact your webmaster or hosting provider.
Enter Your Hosting Information
When you open your FTP client, look for the connection bar at the top of the screen. This is where you enter your FTP credentials.

You will need three pieces of information:
- Host (your server address)
- Username
- Password
Establish the Connection
Once you have entered your FTP credentials, click "Connect." Your FTP client will connect to your website. If the credentials are correct, you will see a screen similar to the one below:
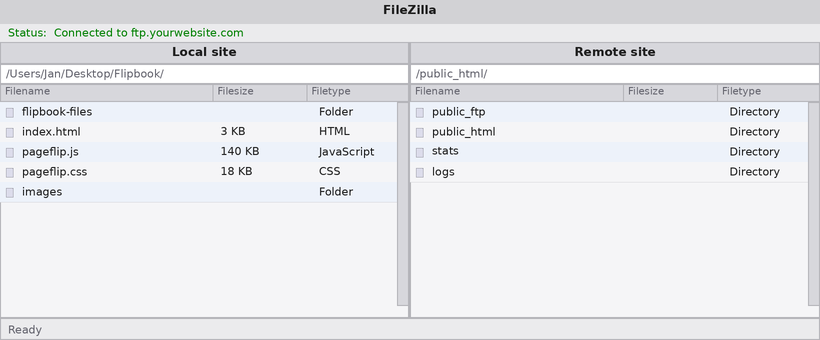
The left side of the screen displays your local computer, while the right side shows the files on your web server. Navigate to the root directory of your website — in most cases, this is a folder called public_html. Double-click it to browse your website files.
Upload Your Flipbook Files
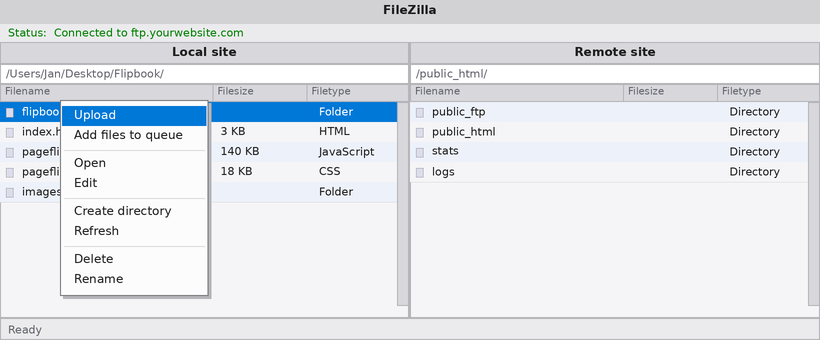
Now that you are connected, it is time to transfer the files. On the left side, navigate to the directory containing your extracted flipbook files. On the right side, navigate to the location on your server where you want the flipbook to live.
Right-click the flipbook folder on the left and select "Upload." Your FTP client will begin transferring all files to your server. This may take a moment depending on the size of your flipbook.
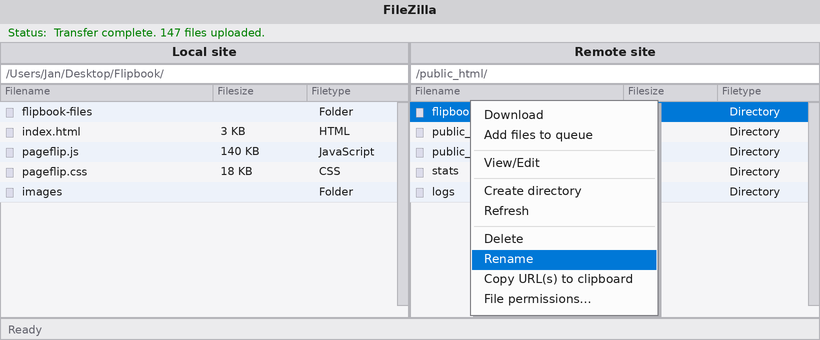
Once the upload is complete, you can right-click the folder on the right side and choose "Rename" to give it a cleaner name, such as flipbook.
Access Your Flipbook
To view your flipbook, open a browser and enter your domain followed by the directory name. For example:
https://www.yourdomain.com/flipbook/
That is it — your flipbook is now live on your website!
Featured Articles
- Uploading a Flipbook to Your Website
- Flip Book Embed Code Generator
- How to Embed Flipbook on WordPress
- Benefits of Using a Flipbook
Businesses use Instant Flipbook


